Friday, March 4, 2011

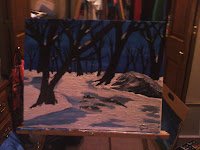
Finished Oil Painting?

So I had my last oil class last week. I pretty much completed my painting although I think I would like to go in and touch a few things up...not sure yet. For my first oil I am satisfied. I know it will take practice to get use to the medium and dry time. I have been quite busy over the past few weeks that I haven't had much time to update this blog. So I am sorry for that. Enjoy!


Tuesday, February 8, 2011

Oil Painting Pt. 2

So I finally had another painting class tonight. After last week's blizzard my class was canceled. I was very good with not touching my painting throughout the past 2 weeks. I was so scared that if I did touch it, I would end up regretting it in the end. So tonight I did a little bit of a touch up on the sky. My oil paints were dry on the canvas. So I had the opportunity to do a wet on dry technique with the oils to get a bit of a more detailed look.

After forcing myself to stop fiddling with the sky I started my work on the water and the horizon line. I started out with just my blue and white mix to reflect a bit of the sky color. But I was finding my water needed a bit of a green tint to it. So I toyed with a few of my paints and created my basic color of the water.

I also determined that I am a full contact painter. Kinda like a full contact athlete. I go all in...I use my hands and fingers and anything that I can to paint. By the time I was at the end of my 2 hour painting class my hands looked like I dipped them in a bucket of blue dye.

I also put in the tree line along the horizon line. Still needs a lot of work, but my painting is coming a long. I have 2 more classes to go...the classes that I need to make up for they were canceled due to weather.


Monday, February 7, 2011

Too Much Snow!

Well after having a blizzard last week and some more snow this week my art class this past week was canceled. I was going to work on my oil paint this past week while being snowed in, but I have found myself playing with a new form or art. Digital Media. I have always been very hesitant on this whole digital thing. Using a mouse to draw on a computer isn't easy. I don't like the feel of it. I like the feel of a pen to paper. Where you can watch what your hand is doing and see your picture at the same time. My mom does have a tablet and stylus pen, but you still have the lack of the pen to paper feeling I desire. Since I am in need of a new computer I have been looking for a tablet laptop that will allow me to advance my capabilities in digital art. But being an artist I would want the best...and need the best...and the best has a lot of money invested into it.

The best out there that I have read about is the Wacom Cintiq. It is a tablet that allows you to have that pen to paper feeling. But it's not a computer, it's only a tablet so I would still have to buy a new computer. The cheaper Wacom Cintiq runs at $1000. So ya...not an easy purchase for me. Thankfully my mom is looking into purchasing it with me so that I can still afford a computer. So with the tablet that I do have...this is what I have been playing with:
lol a work in progress??
A little better??


Also this week I went through the lovely process of filing taxes...which I think is an art in it's self...And Also spent most of my weekend going to and from the hospital for my mom came down with Phenomena and add that with an unknown heart condition you will find your self admitted to the hospital in no time. But thankfully she is doing better and is home now :)

So hopefully tomorrow I will have my art class and will have an update on that for you all :) 

Monday, January 31, 2011

Happy Birthday To Me!!

Such a bad picture of me...*sigh* thanks mom....
If you haven't guessed by the title of this post...it's my birthday! :) I turn 23 today...and I don't feel older...So for my birthday I got to work 8 hours at a daycare where I got beat up by a bunch of toddlers...so I'm sore...I also got to go out for lunch at a local Mexican place....and my mom let it slip that it was my birthday...so the staff decided to come out with a sombrero and some free fried ice cream and sang to me in Spanish. So ya...it was very interesting afternoon.


I then stopped at my favorite store...Hobby Lobby where I stocked up on some fun things to play with while I get snowed in this week by 18 inches of that cold white stuff and a quarter inch of ice...oh and wind too...

Bought some nice art markers to work on my drawing. Also bought some more French Blue Oil Paint for my Oil Painting. Most likely my art class tomorrow night will be canceled so I must keep going on my own with out the teachers help.

So I am also looking at purchasing a HP Tablet Laptop. Or something similar. Because 1) I am in a huge need of a new computer since my current one is out of order 2) my brother is sick of me using his all the time 3) I really think I could benefit from having a touch tablet for my art work :) if anyone has or has used one of these any idea of which one I should get? I really would like a Wacom Critiq but sadly it is wayyyy out of my price range...plus I would be still out of a computer....*sigh* if only money grew on trees....

Saturday, January 29, 2011

UNDER CONSTRUCTION

So since I have decided to up the ante on the whole blog thing...I have decided to upgrade the style or look of my blog. I am going to add some html...well attempt to do this. To make tabs and links to other pages and such. So if you view my blog and you see random or weird links...it's probably a test of what I am doing. I currently changed everything back so as for now it's not messed up any more for the night. Hopefully I will have this figured out by the end of next week. I am open to any tips or ideas on how to do this...so please...don't hold back...remember this is all a learning area for me and for you the readers. So help me out so that I can help you :) Hope to come with a new blog and a new update on my first oil painting...probably Tuesday night after my class. See you all then! 

Thursday, January 27, 2011

Oil Painting Pt. 1

So for Christmas of the 2010 year. My mom bought me a 6 week Oil Paint Course through a new art center that has recently opened up. The Classes would take place for 2 hours every tuesday night for 6 weeks. For 6 week weeks I will attempt to come out of my own element and venture into a whole new Medium of art. For a few years now I have been wanting to try oil painting, but every time I would attempt it I would get discouraged and give up. Oil painting is very different than using acrylics of what I am accustomed to. I wasn't keen on the idea of my paints taking forever to dry. So I stuck to my acrylics.

Last week I had my first Oil Painting class. My teacher is a local artist that paint murals on the side of buildings and is well known for his charcoal and pencil sketches. My first class wasn't much of a painting class as it was a informational guide to materials and such...Which I think could have been handled better by a pan-flit or a paper packet. Once we had that all said and done he wanted us to find a subject to paint. This subject could be in a form of a picture or a still life.
*note* I do not own this picture found it on flicker I claim no rights to the picture.

Once we had our subject we were to sketch it out on our canvas as a guide. Now me I'm not big on sketching things on a canvas because the White Gesso on the canvas doesn't allow the pencil to erase well. It is also very hard to have different shading effects on a Canvas with Gesso on it.
So I decided to first sketch out my subject in a sketch book to see I if I like it from my own hand. Once I did that I sketched it out onto my canvas, but I only did the main outline of my picture to avoid having too much pencil on my canvas (I have read and been told that oil paints can mix with the lead from the pencils making the paint color darker than originally intended)

My Subject in a simple sketch
The Basic outline on my canvas

At my second class held this week we had to present our subject to our teacher and he would look at your sketch and offer some helpful advice. He had told me to draw my line on my dock out at an angle more to have a little more a deeper feel of depth perception. Once done I started to paint. While painting I got to chat with my fellow painters (some still sketching) and one of the girls next to me makes the comment that she shouldn't have sat next to me because she will never get anything done due to her watching me paint. I had a few other people say that they liked my work so far (to me though..still not convinced) So now I must try not to over work my painting.

I have tried not to touch my painting over the past few days and to not change what I have already done. But me being me...I failed at this. I ended up making things too dark and didn't like it at all...so thanks to the oils paints being wet I got the chance to scrape them off my canvas using a palette knife and start all over. So the picture you are about to see is the before I messed it up and started over. I added a pic of what I just did to it...no I promise I won't mess with it...I'm happy with it now...

Before I messed it up... The new and improved :)

Well so far what I have learned is to be light with a brush and with the paint. Also...change your bush direction to give off a different feel (clouds) My sky was done with vertical strokes so I make my clouds doing a horizontal motion with the brush. (you don't even have to use paint for this effect) !!

**When cleaning my brushed I tried to use this Pink Brush Soap...that says on the bottle you can use with oil painted brushes...ya well I think that's wrong because it didn't work. I ended up using a can of paint thinner or oil based paints my dad had. This pulled the paint from my brushes really quick. The down fall is that if has a bad fume so be careful. Also use a pair of rubber gloves if you are doing it by hand. I used a glass Prego Sauce Jar with about half a cup of paint thinner. If you have a lid keep it. Let the paint thinner sit for a while and all of the paint will settle to the bottom leaving the thinner on top...thus letting you able to use it again so that it doesn't go to waste!!!

Saturday, November 20, 2010

Just Close Your Eyes...

I haven't blogged in a while. But I have been painting. Lately I have been trying to paint something from my head. Something that isn't from a picture. This isn't an easy thing to do. Trust me it takes great skill to think up something and just create it and be completely in love with it. Sure it's easy and safe to take a picture or a piece of artwork and copy it and make it your own with a few changes, but you are still altering other people work. But sometimes as an artist you need to take a risk. Jump in and just paint your heart out. Who knows you might surprise yourself.

What you need to do is just close your eyes and just let the picture and what you want to draw or paint come to your mind. Sometimes it can take a while. It might come to you in a dream. Once you have an idea of what you want to paint or draw. Take a sketch pad and spend a little time doing a rough sketch of what you want to do. Yes this seems kind of high school like, but the skills they taught you in high school really do work and you can use them in the real world! (I can't believe I just said that lol). Anywho... Once you have a sketch made up..sit down with your canvas or drawing paper and have at it. If you find along the way you don't like what is infront of you...scrape it...erase it...start over...or just alter what you have infront of you.

I recently just had this same thing happen to me. I was painting this woods river scene and I wanted it to be fall. With all the leaves and colors on the trees and have the water reflect all the colors. Well lets just say it was a bad choice. Luckily I caught this while the paint was still fresh and was able to use some water and paper towels and some of this magic little idk brushes? to wipe up all the bad paint. Once I did that I reapplied some of the background color to fix it up a bit. Then I walked away from it for a while. I was stuck. The idea I originally had was an EPIC FAIL! Then a few days later I decided to make it a winter scene. And I just kept trucking along. And low and behold it worked out. I still had the same scene on my canvas...just in a different season.

Sure it took a lot more work than I would have thought and it wasn't my original plan. But it all worked out in the end. I imagined up my own picture, my own idea, my own painting and I created a decent work of art :) I think we all should try this more often with your artwork. To branch out and become our own painter...be YOU so go on....close your eyes...and dream...dream big or small it doesn't matter just as long as you dream!

Happy Painting!


Monday, February 8, 2010

Whole New Medium

Ok well I needed to take a break from painting. We all have those moments where you have hit a painters block or you are just sick of it...so I had decided to play with some charcoal and do a drawing. I haven't played with this medium since high school so I wasn't sure how it would turn out....but it went well. I had a picture of my cat that I used and went from there. Charcoal drawing can be quite difficult and frustrating...take your time...walk away and come back...I had to do this a few times. But anywho...here it is...enjoy...


Tuesday, February 2, 2010

Trying Something New

Ok so my blog to you is me teaching you about painting. Well I as a painter am a student too. I recently got a new artist painting magazine and came across and idea how to do still lifes and portraits. I myself typicaly paint from a picture and rarely ever do a still life. Infact I think the last time I did a still life was back in high school. So this is a learning experience for both you and me.
I have decided to show you my first attempt at doing this so that you can see the step by step process. Now the I have not mastered this technique in anyway and I am still learning. I may eventually paint over this and redo it lol.


Ok so first we must pic a subject :


I have picked a old Gingerale bottle that I have in my room that I have put a single daisy and some other things I had boughten at hobby lobby. This is a great decor piece that I had made a while ago. And today I am going to paint it. When picking your subject and you are new at doing still lifes...pick something simple and to the point. If you give yourself too many objects with too many colors/shades and shadows then you have more to do and you can get frustrated along the way so keep it simple.


Next you will need a very simple brush, some water, and a very baisc small brush. I used an angle brush ( a brush that tapers to one end ). Now you will need a basic brown, burnt umber, seinna. Something of that sort. Put a bit of paint on your palette and use a spray bottle to put a good amount of water on the palette. Basicaly we are wanting to make your acrylic paints into a sort of water color.


So now you got you've got your subject, your paint ready, and I assume your canvas. Ok so now you are ready to Paint! Basically what you are going to do is sketch a very basic outline of your subject on the canvas with your water down brown acrylic paint. Kinda like using a pencil but instead you are using a paint brush. Keep it simple and just do the outline of your subject. Keep a paper towel handy so that you can dab extra water off your brush as you go along so that the water doesn't run down your canvas. Why do we use a dark color and paint to do this...why not just use a pencil you say? Well using paint will blend in with your paint as you go along and it will also create some depth to your subject. If you use a pencil you might still see your lines in the painting after you are done. That is if you are doing a more opaic watered down painting.


Next you are going to aply the color to the painting. Very basic don't worry about the details. You are going to use water just like before. You can also go back in and darken later. A dark green, light green, yellow, and white will be used.


So then you will just build from the base. Adding more color and definition as you go along. But beware. Don't over work your painting too much. If you get frustrated with something walk away do something else and come back when you are relaxed again. Trust me I have this problem all the time. And before I realize it I have over worked a painting and made it worse and have wished that that I didn't touch it to begin with. So keep building, stay relaxed and calm. Grow with every stroke of the brush. Not every painting you do is going to be amazing and a masterpiece.

The reason for me showing you this new technique and for me trying such a new thing is because it's nice to try new things. If you get so caught up in doing the same old thing every time you paint you will never grow. So break out of your comfort zone and try something new...who knows you might be quite good at it! :) Happy painting!


Saturday, January 30, 2010

Sometimes Less IS Better

Typically when you are painting lets say a wall of a house you don't want to spread the paint too thin. You want a nice thick and even coat. And for such a project I would stick with it because it will look nicer in the long run. BUT if you are painting on a canvas and creating a fine piece to art you can play with how think you spread the paint. You might find that in some cases less paint just might be better.

To really make the effect of thinning out your acrylic paint work the best you should use water. With oil paints you have a paint thinner that you can use..but here I am going to discuss acrylic paints.

If you don't use water to thin out the paint on the canvas you will find yourself using more paint than you really want to. When you thin out the paint you get an almost Tuscan feel to it. Its a cool thing to have on a canvas...thicker paint in one area and really think paint to where you can almost see the white of the canvas in the other area. Now keep in mind though...you are adding water to the paint...so therefore it will take longer to dry. So if you plan on putting a different color on the top of the color you thinned out you might want to let it dry some. The water on the canvas might try to thin out paint you don't want to thin out, plus a wet paint mixes more with other paint. So if you want to put yellow on top of blue, let it dry. If you don't...you will get the lovely color green and you will be kicking yourself for not being patient.

A good way to use water with your paints is keep a spray bottle handy. This is good to have around to keep your paints nice and wet because acrylics tend to dry out faster than you plan on them drying and then before you know it you wasted all that paint...and trust me...wasting paint is money down the drain! Spray water on the palette and on the paint its self....play with it some to see how much water you want and don't want. I wouldn't spray your canvas...keep the water on the brush because then you are in control on how much water you put on the canvas and where it goes. If you spray the canvas you are gonna have splattered and runny paint. So keep it on the brush.

So try this out and see how it works for you, because sometimes you will find Less Is Better!

Happy Painting!

Monday, November 16, 2009

Brush Care

Taking care of your paint brushes is a HUGE key in painting. If you don't take care of your brushes you can ruin you painting before you even realize it. If you don't clean your brushes properly you can leave paint residue behind on the bristles. If this happens and you want to work with yellow and you have blue still on your brush....lets just say you will get a greenish color on your canvas.

When you are painting have a jar of water handy. Brushes that you have used and are done with for the time being place them in the water. Now there doesn't have to be a lot of water in the jar. You just need enough to cover the bristles of the brushes. This will keep the paint from drying on the brush when they are not in use. If you are working with Acrylics keep in mind that Acrylics dry quickly so if you don't submerge your brush in water the paint will dry on the brush and this is quite hard to clean off. You would be better of throwing the brush away.

When you are done painting you will want to clean out your brushes right away. If they sit in water for too long like over night lets say...the metal piece that holds the bristles together might rust.

Now this is how you should wash your brushes for acrylics, oils cause a little more extensive cleaning rituals than for acrylics. Use cool water, warm water can cause the paint to dry and that is the opposite of what you want. You can use dish soap or a bar of soap. Lather soap onto your brushes by painting the bar with the brushs....or is you are using liquid soap put some in your hand and paint the brush in the palm of you hand. Use the cool water to rinse until the water runs clear. Repeat if needed. Dry off your brushes using a towel of some sort. By doing this you keep the metal on the brush from rusting and you can all see the condition of your brush. If the bristles are falling out and are colored from many uses of paint. If that is the case you might want to invest in some new brushes.

Storing your brushes properly is just as important as cleaning them. If you are storing them in an upright position you will want to store them so that the brush end is up and not smashed down on the surface. If you smash your brushes it can deform your brushes and you will lose the firmness and purpose of the that type of brush. If you are lying the brush down when storing them be sure to run the brushes all the same way and not to place anything heavy on them.

One thing to remember that the more you paint the more brushes you will go through. So I would invest in some nice paint brushes. Horse hair brushes can get a little pricey, but they are nicer and last longer. If you are really wanting to send some money you can buy a goat haired brush. The more money you send the longer the brush will last....but this also is depending on how you care for your brushes. So if you want your brushes to last...spend a little time and money and you will be just fine. Happy painting!

Sunday, November 15, 2009

Paints and Mediums

If you are going to be painting or using any type of medium you should know a little about what you are working with. A medium is they type of material you are working with. Watercolor, Acrylic, Tempera, and Oil Paints are all different types of medium. All of these have different binders in the paint that binds the pigment together. These binders are what makes a paint that type of medium.

In Acrylic paints you have a water based binder called polymer. Having this water based binder gives the paint the quick drying that you get. The reason why I work with Acrylic is for this type of quick dry. A quick drying paint lets me go over previous work a lot faster. Where as with oil paints you might have to wait up to a week before you can go over anything or just to start a new layer. Acrylics blend very well together and you can easily come up with the perfect shade and hue that you are looking for. And another nice thing about Acrylic and it being water based. It makes clean up really nice. You can easily clean your brushes and palette with just water. No chemicals or paint thinners needed. A little soap can be used when cleaning your brushes but that's a whole nother canvas we will paint later :) How the binder works in this paint is as the paint is drying on your canvas, paper, or whatever type of surface you are using, the water binder evaporates. Water evaporation gives you that 10 minute quick dry. The water base in acrylics make the paint very versatile. You can add more water to the paint to make a watered down effect, or make it appear like a water color. If you hate what you made you can easily paint over it with white paint once it is dry and start over. And with a short drying time that makes it even better. And if you want a little extended drying time on your paint you can add a special medium to your acrylics to slow down the drying. It's called a retarder. There are different types of retarders out there so make sure you do your research and read the label of what you are using before you mix it in.

Oil paints on the other hand are a completely different medium. Before with acrylic you had a water based binder. This one has an oil based binder...thus the name. Different pigments have different drying times. Some could take a day to dry, others could take up to a week or more to dry. And keep in mind, the thicker you make the paint and the coat you are working on, the longer the drying time. Try to keep it simple if you are just starting out. I myself am not a fan of Oil paints. I don't like to wait to paint. And with oil paints you can easily over work the painting and by the time you realize it you can just start over in 15 minutes. You either have to scrap the canvas all together or wait till it is dry. Now some painters love oil paints because you can easily go back in and work with the same color because it is still wet. And some don't. Work with what you are most comfortable with. If you don't mind the wait Oil paints are for you. If you are not a waiting type painter....well you might want to find a different type of medium to work with. Oil paints and clean up are not as easy as acrylics are. You might need different paint thinners and cleaners to clean your brushes out. I also do not recommend putting a lot of paint down the drain if it is oil based. You are better off putting a palette lid on if you can or just dump it in the trash. I wouldn't recommend putting any paint down the drain. Acrylics you can do a little because of the water base in the paint, but I still don't recommend doing it.

Watercolors are pretty self explanatory. I was never a fan of watercolors. It takes a good hand and skill to master this. Too much water and you can ruin your piece, not enough water and you won't get the look you are looking for. I personally need to play with watercolors a bit more to explain more of what the paint is and does compared to the others.

Lastly, but not least you have Tempera. Tempera is another water based type paint. It is a thinner paint that when it dries it produces a smooth surface. It is very hard to put texture in the painting like you can with oils and acrylics. A lot of famous painters have used tempera, but more and more I think tempera is the lesser used medium. Tempera is more used for window painting and poster painting because of the thinness and the smoothness it gives once dry. Tempera paint dries very quickly like acrylic paint. Clean up is fairly easy. A little water and soap will do the trick.

Price Scale:
-Tempera you will find is the cheapest, and you get the most for your money. Thus why in most schools such as elementary and high school this is used the most in their art classes. It's cheap and cleans up nicely. 16 oz bottles of the paint range from $2.50-$5.50 area

- Water Color is a little more money but still affordable. This paint you can buy in the tubes separately or in a set. Usually you are better off buying a set and then buying a tube of the paint you use most of. Prices vary here from $2.00 up to $14.oo it just depends on the brand and the number in the set.

- Acrylics are about the same as watercolor. Individually the prices might be more but again like the water colors you are better off buying in a set and then buying the color you need more of...like white (for me anyway). So prices are from $2.00 - $14.oo.

- Oil paints are your most expensive paints. I recently bought a paint set for $32.00. I would recommend buying these paints when they are on sale. But beware...paints go fast when you are using them...and with high prices you might want to watch how much you are using and how much you are wasting. Just a little idea.

Saturday, November 14, 2009

My Hidden Talent

Two years go this December I came across a hidden talent. I discovered a very much happy medium...well the medium of acrylic paints that is. I have always loved to sketch and doodle while in school. I took art class all 4 years of high school. In high school I was ok at painting and any art, but I wasn't great at it. Sometimes I wonder how I got from point A to point B.

As I look back and compare myself from then to now I have realized the difference. Back in high school I wasn't painting just to paint or painting for myself. I had to paint for a grade, paint for my art teacher. We were constantly working with one medium to another. Never really getting to just sit with your favorite. And when put on a time schedule for a grade...lets just say things didn't get done or was done in a fast manner. Painting for me now is a lot different. I get to paint on my own terms. I can take all the time in the world. Use as much or as little paint as I like. And the only person I have to get the approval of for my work is myself. No grades, no time schedule, no bouncing around from medium to medium. It's just me, my mind, my brushes, and a blank canvas.

I think the first time I realized I had a passion for it was at my Dad's Family Thanks Giving two years back. I was just playing around with a few things and my aunt mentioned to me that I was quite good at what I was doing. Which to me was just toying around with some cheap paints and brushes. A month later I had a lot on my plate that I was dealing with. I had some issues with school, knee surgery, and Lord knows what else. So I turned to painting. I decided to paint my mom and my sister Christmas presents because one it was cheap, and two I needed something to do to get my mind off things. Lets just say painting was a great outlet for me.

By the time Christmas Eve rolled around I had put out three different paintings. Two for my mom and one for my sister. When it came time for my mom and sister to open their gifts we all realized what a gift I had. Now I am not saying I am the queen of painting. And that I am the next Van Gogh, but I definitely had a talent for it. My sister called it my "hidden talent".

So here today I am creating this blog to share with you all my hidden talent. I will post my projects and my artwork for you all to see. I might also share some knowledge of art and how-to's and such. So this is me Jenny...from the tip of my paint brush.